
The Power of the Sun: A Solar Energy Experiment for Kids
Have you ever noticed how warm and bright it feels outside on a sunny day? That’s because the sun is a powerful force of nature, capable of providing us with clean and renewable energy.
This energy is known as solar energy, and it’s becoming increasingly important in our efforts to reduce carbon emissions and combat climate change. Solar energy is so important that many scientists are devoting their careers to finding ways to harness its power efficiently.
But even kids can get in on the fun! You can conduct your solar energy experiment at home with just a few simple materials.
Why Solar Energy Matters
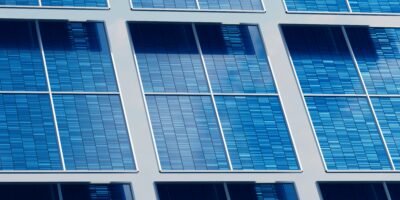
Solar energy is a fantastic resource because it doesn’t produce harmful pollutants or greenhouse gases like traditional fossil fuels. Instead, solar panels use unique technologies to convert sunlight directly into electricity.
This means we can power our homes and businesses without relying on non-renewable resources like coal or oil. And since the sun provides an almost endless energy supply, we don’t have to worry about running out anytime soon!
The Solar Energy Experiment for Kids
Now that you know how amazing solar energy is, it’s time to start your experiment! We will build a simple solar oven using just a few basic materials for this activity.
This experiment aims to show how sunlight can be used to cook food – something people have been doing for thousands of years! By harnessing the power of the sun, you’ll be able to make delicious treats while learning about renewable energy at the same time.
Materials needed
You’ll need some basic materials to conduct a successful solar energy experiment. Some of these may be items you already have around the house, while others may require a quick trip to your local hardware store or craft supply shop.
Solar oven
Here is what you’ll need to build your simple solar oven:
- Cardboard box (large enough to hold the food item you want to cook)
- Aluminum foil
- Craft knife or scissors
- Ruler or measuring tape
- Pencil or pen
- Cutting board or sturdy surface for cutting cardboard on
- Tape
- Plastic wrap
Sunlight intensity measurement
To measure sunlight intensity, use a smartphone app (such as LightMeter) or purchase a simple light meter online or at an electronics store. Some additional materials that might be helpful when measuring sunlight intensity include:
- An adjustable tripod (to keep the phone or light meter steady and pointed in the right direction)
- A compass (to help determine where south is so that you can position your solar panels correctly)
- A piece of cardboard with a small hole in it (to block out all light except for what’s coming from your target area)
Diy Solar panel
Making a DIY Solar Panel is also easy with these basic materials:
- Alligator clips
- Copper wires
- Silicon cells
The materials above should be available at your local hardware, electronics store or online. With these materials, you’ll be able to construct a small-scale solar panel that produces electricity when it’s exposed to sunlight. Now that you have all the materials for the experiment, let’s get to work building our solar oven and making our very own DIY solar panel!
Building a Simple Solar Oven
The Magic of Solar Energy
Before we jump into building a solar oven, it’s essential to understand the magic behind solar energy. Solar energy is the energy we get from the sun’s rays. When the sun’s rays hit an object, they either reflect off or are absorbed by that object.
When an object absorbs sunlight, it converts that energy into heat. This makes solar ovens work – they absorb sunlight and convert that energy into heat, which cooks our food.
Materials Needed
Here are the materials you’ll need to build your simple solar oven:
- A cardboard box with a lid (about 12×12 inches)
- Aluminum foil
- Plastic wrap
- Tape (duct or masking tape)
- A box cutter or scissors (only for adult use)
Step-by-Step Instructions
Step 1: cut off one side of your cardboard box.
Step 2: line the inside of your box with aluminum foil.
Step 3: cut two pieces of plastic wrap large enough to cover the opening of your box.
Step 4: tape one piece of plastic wrap to the top side of the opening and leave some extra plastic overhang on each side so you can seal it later.
Step 5: Repeat step four with another piece of plastic wrap on top but seal it on the other sides.
Note: if you have trouble getting it to stick, wipe down any moisture from around where you want to tape and try again with new tape.
Step 6: cover the box’s exterior by wrapping it with aluminum foil.
Step 7: find a spot in full sun and adjust the plastic wrap to focus sunlight into your oven.
How It Works
The sun’s rays come through the plastic wrap and heat the air inside the box. The aluminum foil reflects this heat around, creating a greenhouse effect. This trapped heat can get quite hot, and that’s what cooks our food inside of the solar oven!
Testing the solar oven
Now that you’ve built your solar oven, it’s time to put it to the test! S’mores is one of the most fun things to cook in a solar oven.
All you need is graham crackers, chocolate bars, and marshmallows. Assemble the s’mores and place them on foil inside your solar oven.
Ensure you position the oven to get as much direct sunlight as possible. Leave them in for about 10 minutes or until everything is melted and gooey.
You can also cook hot dogs in your solar oven. Place a couple of hot dogs on a skewer (or use tongs if you don’t have one), then put them on a piece of foil inside the oven.
Again, make sure they’re positioned for optimum sun exposure. Cook for about 30 minutes or until they’re heated through.
Remember that cooking times will vary depending on how hot your solar oven gets and how much sunlight there is. It may take some trial and error to determine what works best for you, but that’s part of the fun!
Tips on how to position the oven for maximum sun exposure
Getting as much direct sunlight as possible is the key to using a solar oven. Here are some tips:
- Find an open space: Look for an open area without trees or obstructions blocking the sun.
- Face south: Position your solar oven to face south (in the northern hemisphere) or north (in the southern hemisphere).
- Maintain angle: Angle your solar panel at about 45 degrees from horizontal.
- Moving throughout the day: Move it periodically throughout sunny hours so it remains facing directly where the sun is currently located.
- Use a reflector: You can increase the sunlight your oven gets by using a reflector. Place a piece of foil or a mirror behind the oven to bounce more light onto it.
If you’re not getting enough sunlight, try moving your solar oven to a different location or adjusting its position.
Measuring Sunlight Intensity
How to measure sunlight intensity with a smartphone app or a simple light meter
Measuring sunlight intensity is important for understanding the amount of energy available from the sun. This information can be used to maximize the efficiency of solar panels.
There are many different ways to measure sunlight intensity, but two of the easiest and most accessible methods are with a smartphone app or a simple light meter. Many smartphones have built-in light sensors that allow them to measure light levels.
Several free apps are available for download that can turn your phone into a light meter. These apps use the phone’s camera and sensor to measure light levels in Lux or Foot-candles, which are units of measurement for illuminance.
For those who prefer using a dedicated device, simple handheld light meters can detect and measure sunlight intensity. These meters typically have a small sensor on one end that measures incoming light and display the results on an LCD screen.
Explanation of why measuring sunlight intensity is essential for maximizing the efficiency of solar panels.
Measuring sunlight intensity is essential for getting the most out of solar panels because it helps determine how much energy can be harvested from incoming sunshine. Knowing this information enables you to optimize panel placement and positioning so they receive maximum exposure to sunlight throughout the day. By measuring sunlight intensity at different times throughout the day in various locations around your home or property, you can identify areas where panels will receive optimal levels of sunshine and avoid shaded areas where production will be suboptimal.
With this knowledge, you can make informed decisions about panel placement and ensure they perform at their highest efficiency. Measuring sunlight intensity with a smartphone app or handheld device allows homeowners and DIY enthusiasts alike to maximize their use of solar energy by optimizing panel placement based on data-driven insights about how much sunshine their panels will receive at any given time.
Making a DIY Solar Panel
Building Your Solar Panels Can Be Fun and Educational
In this section, we’ll walk you through building your solar panel. This is a great project to do with kids as it’s not only fun but also educational. By building their solar panel, they’ll learn about renewable energy sources and how they can help reduce our carbon footprint.
Step-by-Step Instructions on Building Your Own Solar Panel
Gathering the needed materials is the first step in making your DIY solar panel. You will need copper wires, alligator clips, silicon cells, a soldering gun (or iron), and a piece of plywood.
Next, you must connect the silicon cells in series using copper wires. This will create an electrical circuit that will generate electricity when exposed to sunlight.
Once you have connected the cells, attach them to a piece of plywood using alligator clips. You’ll connect the circuit to an external device, such as a battery or light bulb.
Explanation of How Electricity is Generated from Sunlight
When sunlight hits the silicon cells within the solar panel, it generates an electric field. The energy from the sun’s rays excites electrons within the silicon atoms causing them to move freely throughout the cell and generate an electrical current. This current can be stored in a battery or used immediately by connecting it directly to an appliance or light bulb.
The more sunlight hits the cells, the greater the electricity your solar panel system generates. By creating your DIY solar panels with kids or as part of educational activities at home and school, we can help raise awareness about renewable energy sources while having fun building something meaningful together.
Conclusion
Recap of what was learned through the experiment
Congratulations! You have completed your solar energy experiment and explored the exciting world of renewable energy.
By building a simple solar oven, you have learned how to harness the power of the sun to cook food. You also discovered how to measure sunlight intensity and create a small-scale DIY solar panel that generates electricity.
Furthermore, you learned why solar energy is essential and how it can help reduce our carbon footprint and fight climate change. Overall, this experiment has provided a basic understanding of solar energy and its benefits.
Encouragement to continue exploring renewable energy sources
We hope this experiment has inspired you to continue exploring renewable energy sources and their potential for creating a sustainable future. There are many other types of renewable energy besides solar, such as wind, hydro, geothermal, and biomass.
By continuing to learn more about these technologies, we can work together toward reducing our dependence on fossil fuels and creating a cleaner planet for future generations. Remember that every little step counts.
Even small changes like turning off lights when leaving a room or using public transportation instead of driving can significantly impact over time. Let’s all do our part in making the world a better place!